
Cinematic Creations: The Editing Process Behind a Hero Shot

This article was originally written for my blog. Thanks to the BrickNerd team for their interest in featuring it here for Nerdvember!
What’s a hero shot, you ask? Well, it’s the distilled essence of a moment of epicness, the high point of a heroic act of daring, the emotion-charged second when against all odds a hero confronts seemingly unstoppable evil. So, basically, a cool scene with two clear characters facing off.
I recently built two of these “hero shots” for the Middle Earth LEGO Olympics. The first one is a recreation of Eowyn’s fight with the King of Angmar.

The second scene is Glorfindel facing a Balrog.

While I intentionally gave these two scenes very different colors and atmospheres, they share some striking similarities: both are low angles, framing the carefully posed backside of a minifigure that looks larger than life, with a clearly evil menace confronting the minifigure and showing its face to the audience.
This kind of art is meant to put you right in the moment, as you look over the hero’s shoulder and almost feel like you’re in his shoes, fearlessly facing danger. But how is it done?
Eowyn’s Fight With The King of Angmar
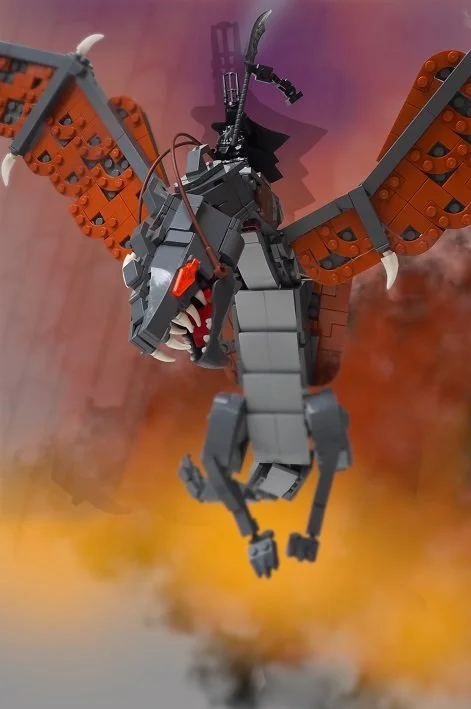
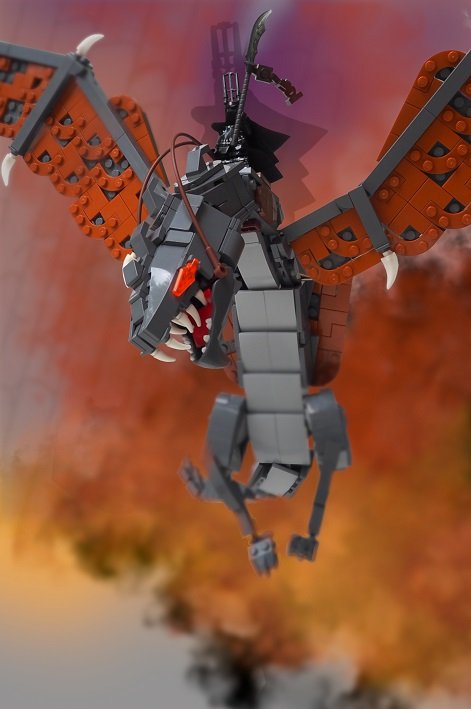
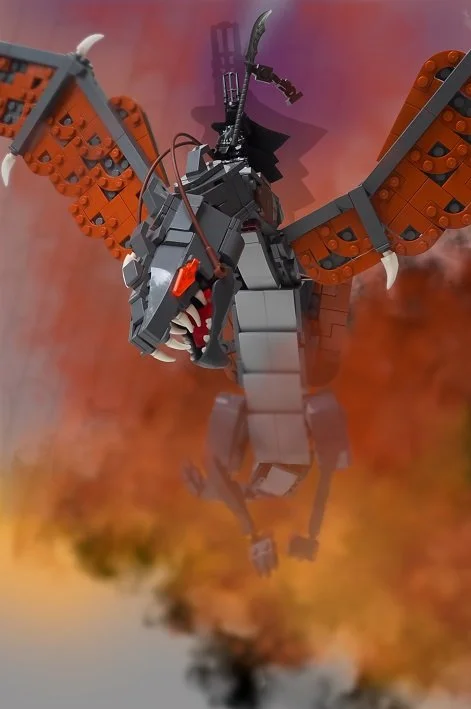
First off is the build itself. Suspending a dragon in midair has its challenges, but that’s not what I’m gonna talk about right now. Instead, I want to focus on what really makes this shot unique; the perspective.
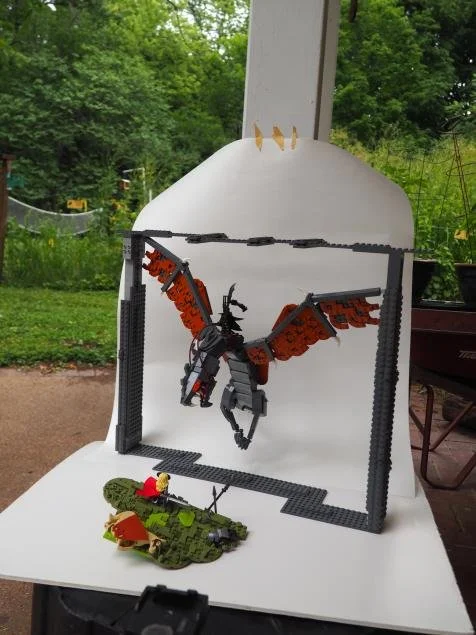
This creation consists of two totally separate parts–which allows me plenty of room for adjustment on the photo table. But notice especially the front–the hero’s platform. Not only is this obviously angled horizontally to achieve the look of a hill, it’s also angled vertically to allow me to capture the grass with the camera even from a low angle. To compensate, the minifigure is not attached to the baseplate but is loosely laid on top (with a 1×1 plate under the right leg) in a position that will look straight through the camera.
So, after playing around a bit with the distances until everything was in frame just right, I took four pictures, and then moved on to GIMP.
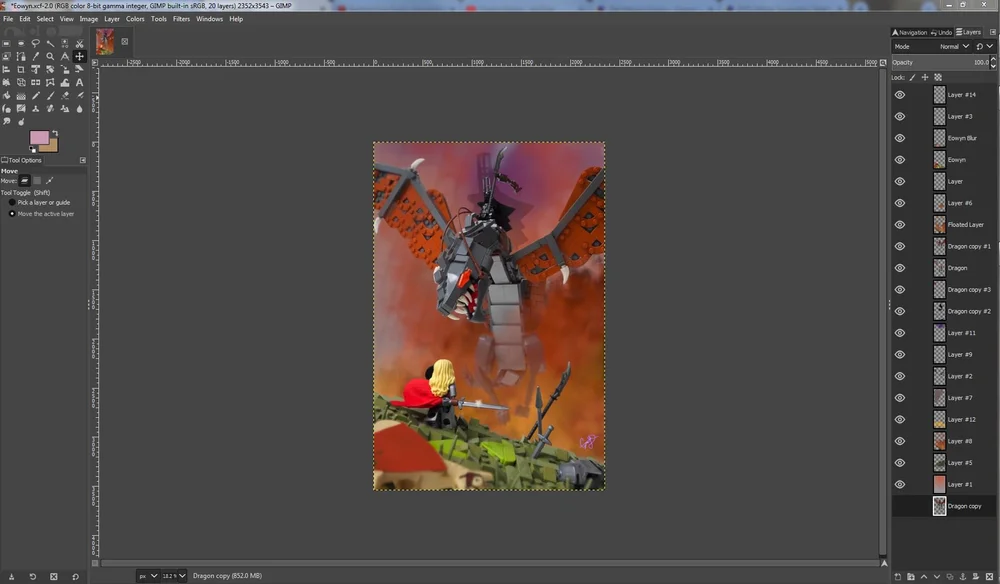
That’s what we’re really going to talk about in this article. I’ve done lots of Behind the Scenes looking at how exactly I built something, so I figured it was about time to focus more on what comes next; the editing.
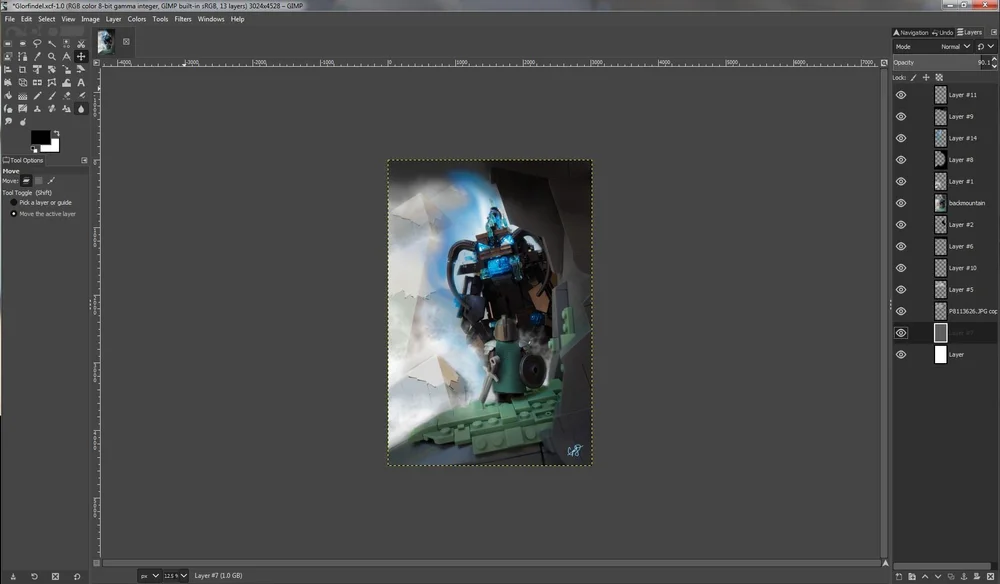
If you glance to the right on the previous picture, you’ll see that I have over a dozen layers making up the final image. So I’ll walk you through them one by one until we get a clear picture of what all is going on in this hero shot.
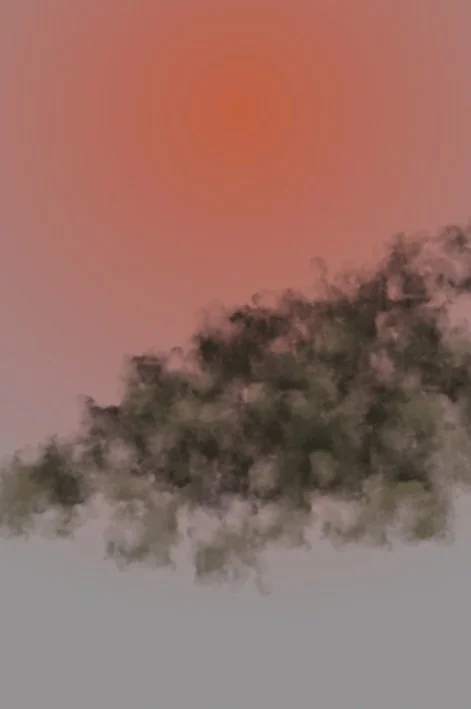
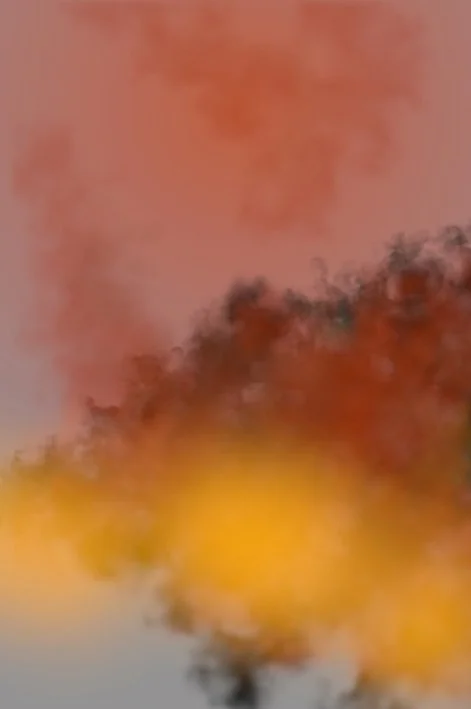
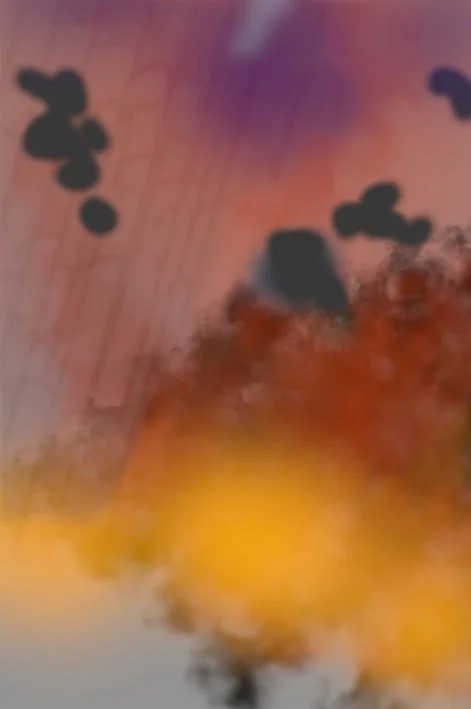
First off, the background. (Needless to say, this is not the order I design the layers in.) This is actually a radial gradient from orange to grey, with the center of the gradient being up towards the top.

Next, a bit of smoke. This is a smoke brush in black, probably with a slightly lowered opacity.
Now for some more smoke, this time in a variety of reds, orange, and yellows. After drawing it with the smoke brush, I gave it a gaussian blur to make it look more foggy.
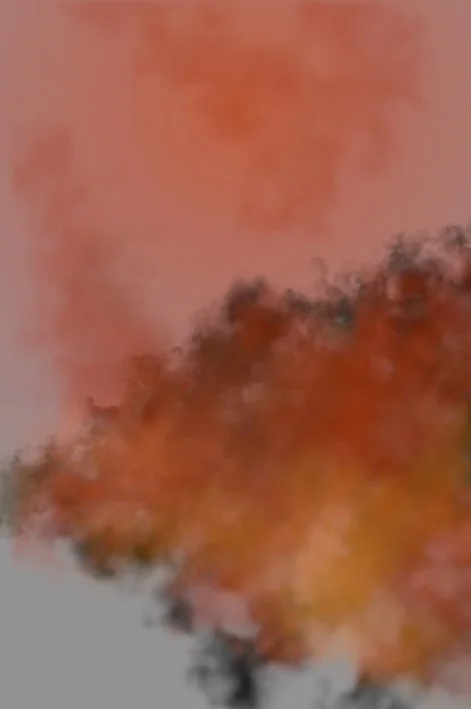
Now for some fire! A few large dots of hard yellow and then a bit of touch up with the smudge feature.
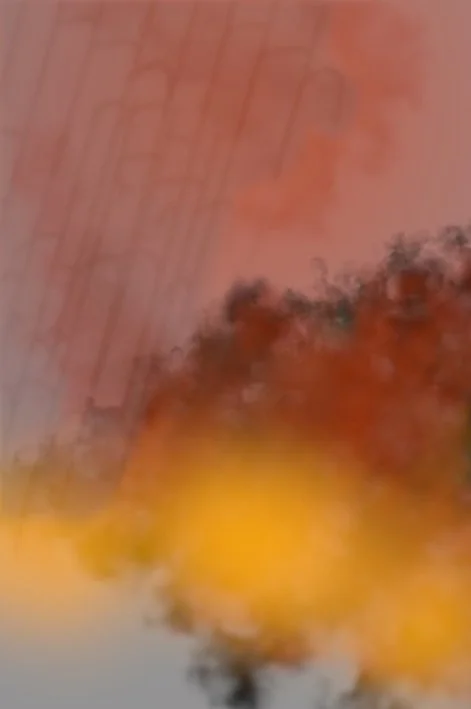
The next layer is a few subtle lines I drew, meant to imitate the rising skyline of Minas Tirth. These are hard black, but the layer’s opacity is set to around 15%.
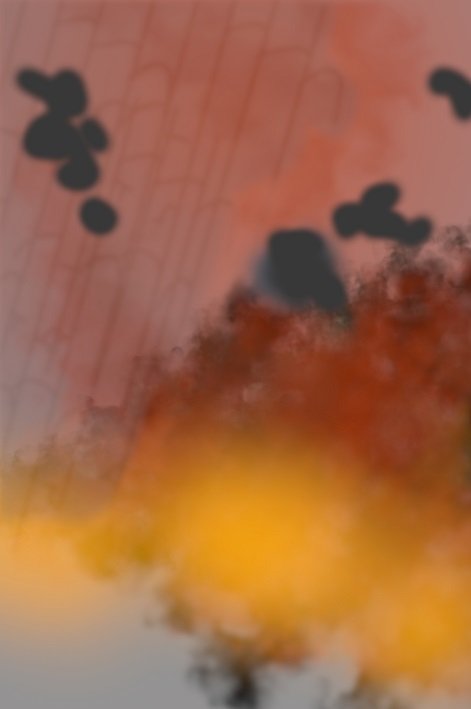
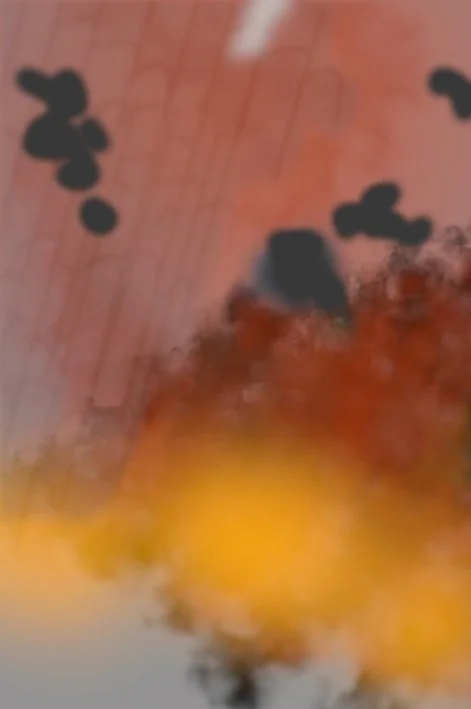
This next layer is a weird one! It’s a bunch of hard grey dots. These are strategically located behind the dragon wings in spots where the white paper background I shot against shone through. I edited out the white, but I needed something back there other than the reddish background.
Next up we have a tiny bit of white light. Again, a hard white line touched up with the smudge tool.
Similarly, a bit of purple, some gaussian blurring and smudging. Incidentally, this didn’t start out purple. I used red or something and then used the colorize tool to slide up and down the entire color spectrum until I found the color that harmonized best with the rest of the shot.
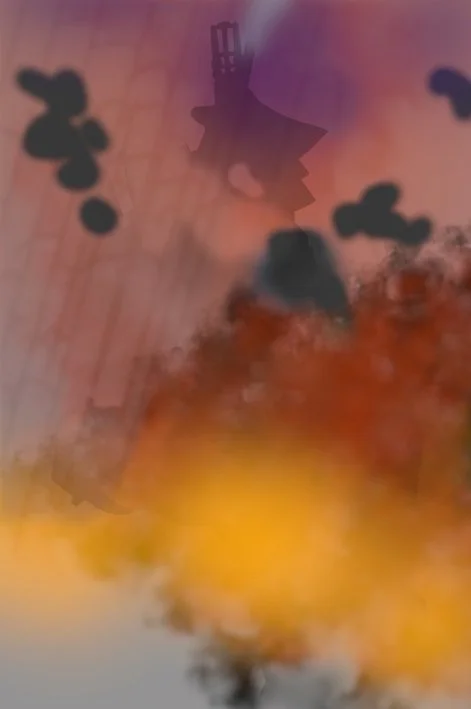
This next bit is finally part of the actual build. I cropped out the witch king, upscaled him a bit, drove the brightness into the basement until it was black, and then reduced layer opacity.
Now we start to add the dragon. I mentioned before that I took four pictures: all four from exactly the same angle, but with different focuses. So at this point I’m stacking the focuses.
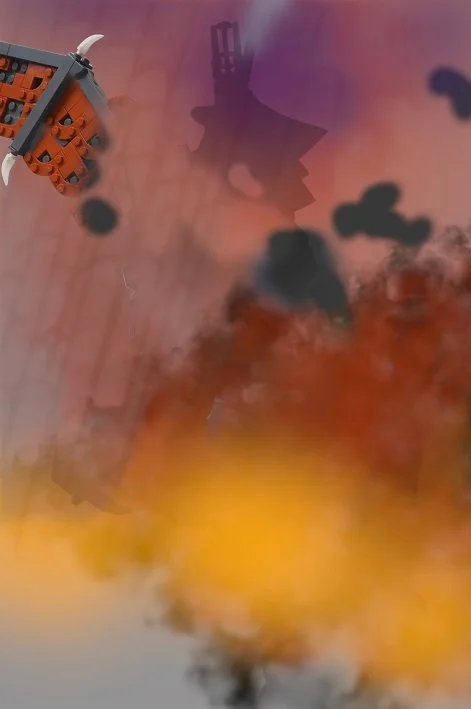
But it turned out, I didn’t really want the whole dragon perfectly in focus. So I actually blurred this part in post-process. The advantage to doing it this way? It’s easier to cut an in-focus picture using the lasso tool than to try to disentangle the blurry edges of one that’s not in focus.
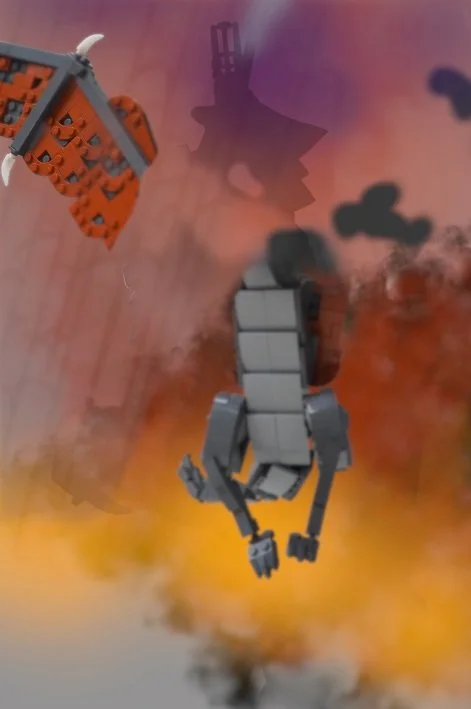
Things are finally starting to come together when the rest of the dragon gets added. If you were on the spot when I first uploaded this creation to Flickr, you may have noticed that there was a significant white line around the dragon at that time—a bit of residual from when I cut it out with the lasso tool. I went back with the eraser to eliminate that. Because the eraser erases on a gradient (if you’re using a soft brush), I find it looks more natural when eliminating small bits of background color. It’s painstaking though!
Now let’s add a bit of a dirtier yellow fog to the bottom.
And some fog over the dragon, to make it look like it’s really coming up towards the viewer.
This next layer is again a composite, with several pictures having been taken to get Eowyn, the spears, and the fallen knight in focus at the same time.
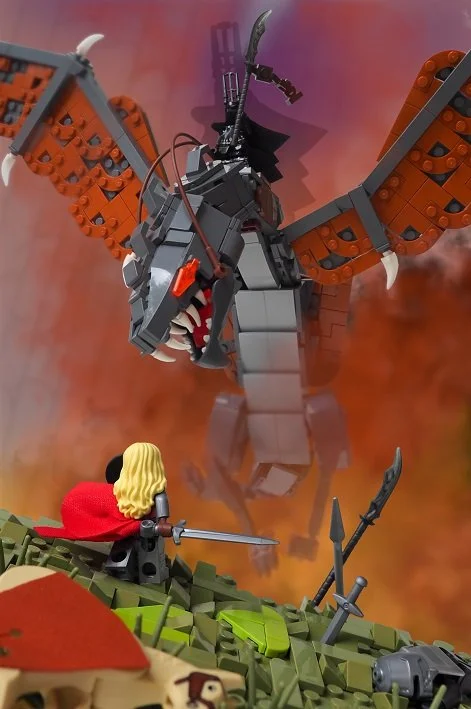
But we don’t really want the horse and grass in front to be in such sharp focus; that doesn’t feel natural. So duplicate the previous layer, give it a slight gaussian blur, then erase the parts that need to be in focus so the previous layer shines through.

Last but not least, a small shiny star of white, blurred just a touch, reflects the light on Eown’s sword.

Glorfindel Facing a Balrog
So now that we’ve seen how to do it once, how about applying those same basic concepts to a totally different photo and really mastering them?
This time we have four separate components, not to mention a bunch of wires coming out from behind the Balrog. With all this stuff to tweak, I literally spent an hour getting one single angle.
Let’s start again with a look at the completed picture in GIMP. A few less layers than last time, mostly because I used the merge down more generously.
For starters, take a look at my first layer:

Ye-es, showing that was probably overkill. But it illustrates a handy technique; use a white background, put a black one on top, and then slide the opacity on the background around until you get just the right shade of grey.

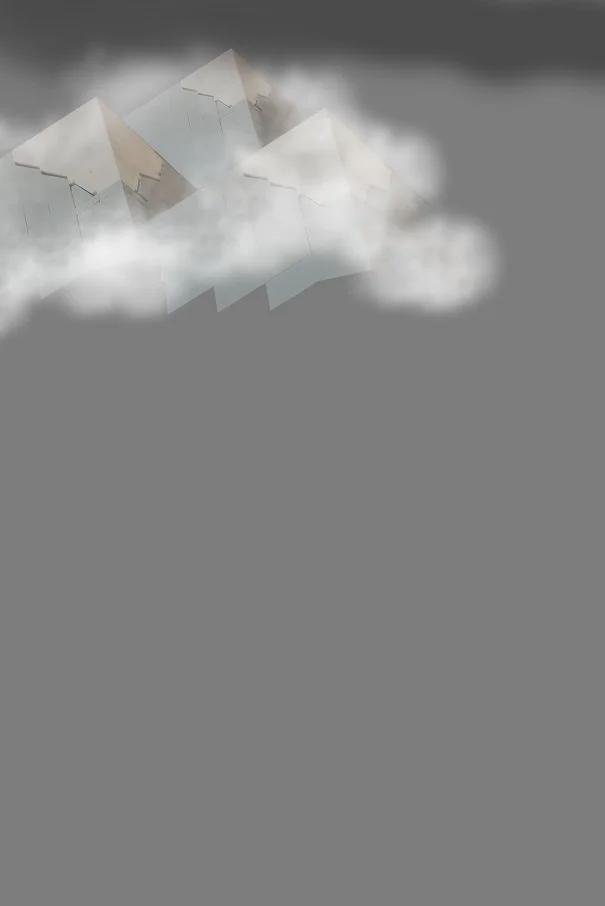
Moving from bottom to top, the next layer is these three mountains. Here’s an instance where I merged down. I only built one of these mountains, so I tripled them in GIMP, after cutting them out from their surroundings of course, and then arranged them along the horizon.
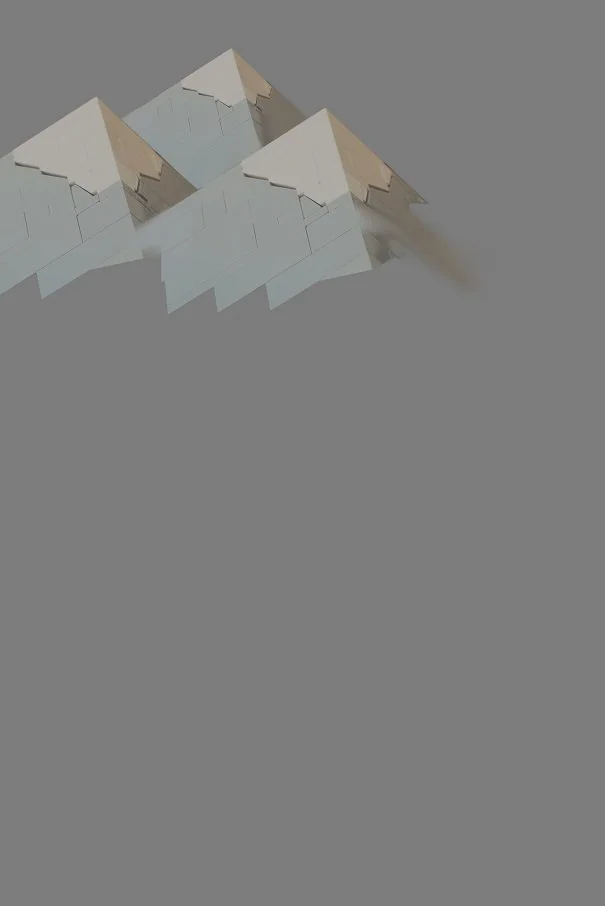
To cover over the unsightly edges of the mountains I drew some white fog and blurred it with the gaussian blur filter.
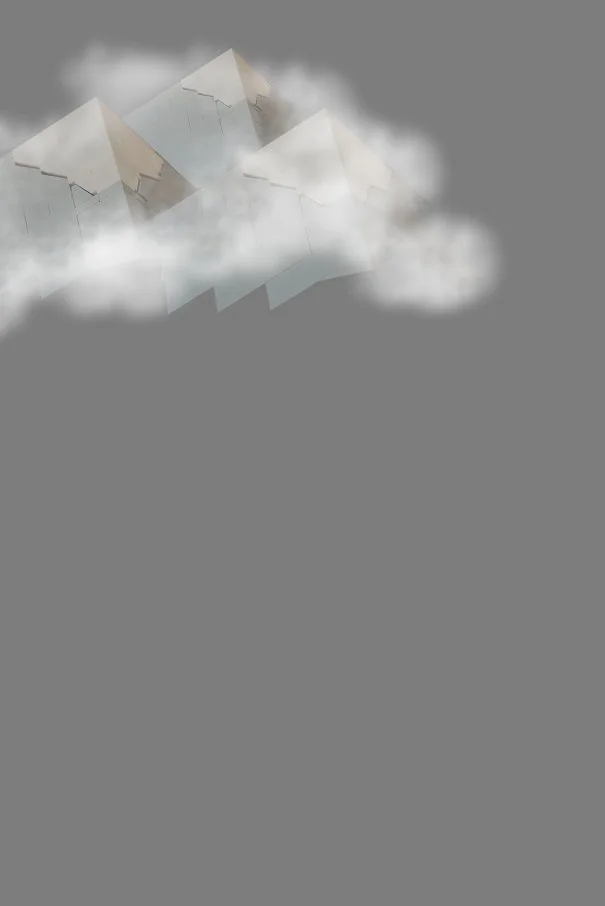
Some low hanging dark clouds get added to the scene next.
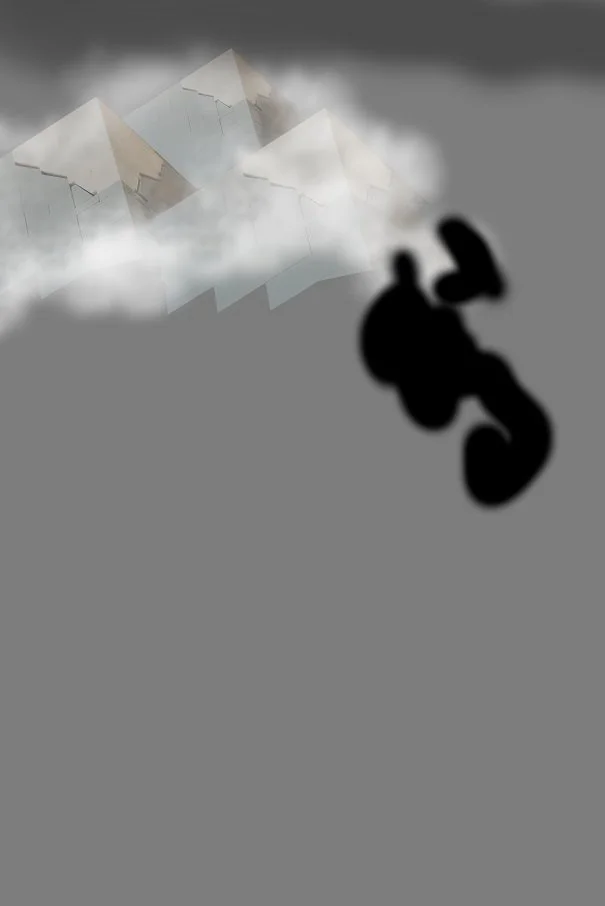
Now for some black scribbles to keep the light grey background from shining through the Balrog in unwanted places.
Next comes the main photographed layer. Here’s something I did a little differently from last time; instead of cutting each piece out and adding layers of fog between them, I added the fog on top of the main photo.

For that to work, I had to carefully erase any fog that had spilled over onto foreground elements.
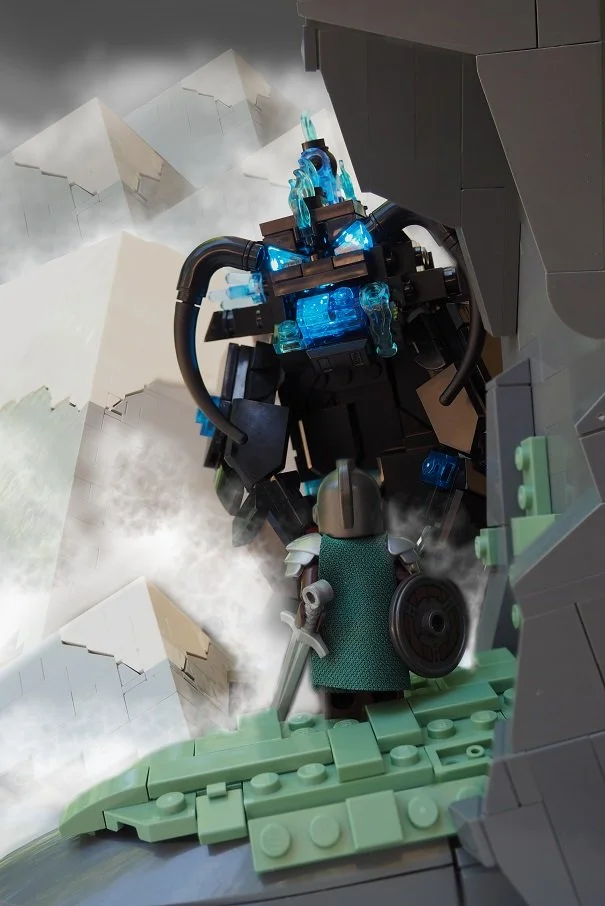
The next addition is a low-opacity layer of black over the rock, making it a little darker.
At this point, I almost called it done. But I felt like the Balrog was lacking a bit of menace. How about some more blue flame?
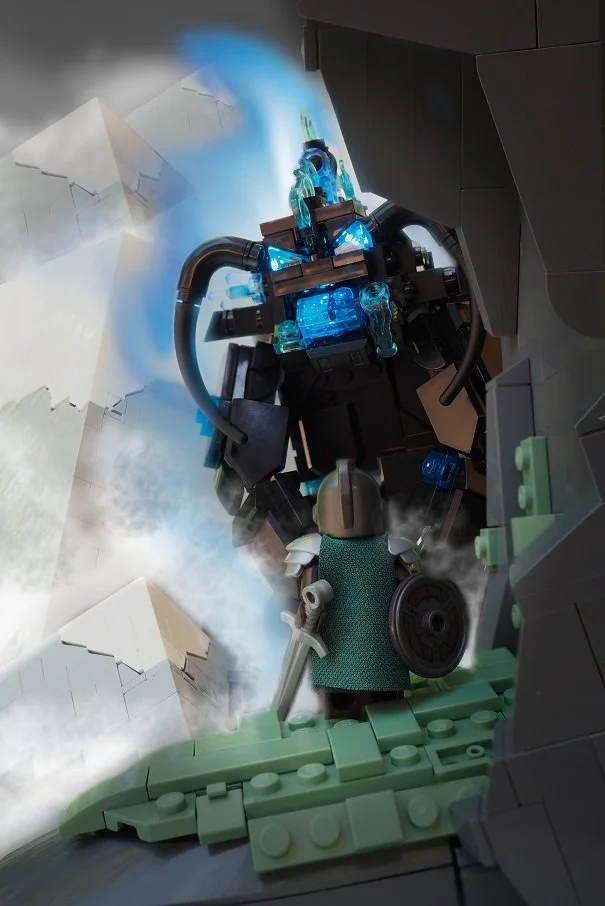
To create the flame, I drew dark blue, then smaller bits of light blue on top of that, then a few lines of white. I blended all these colors using the smudge tool until they looked right to me. Then I went through and erased spots where the flame was covering over the balrog.
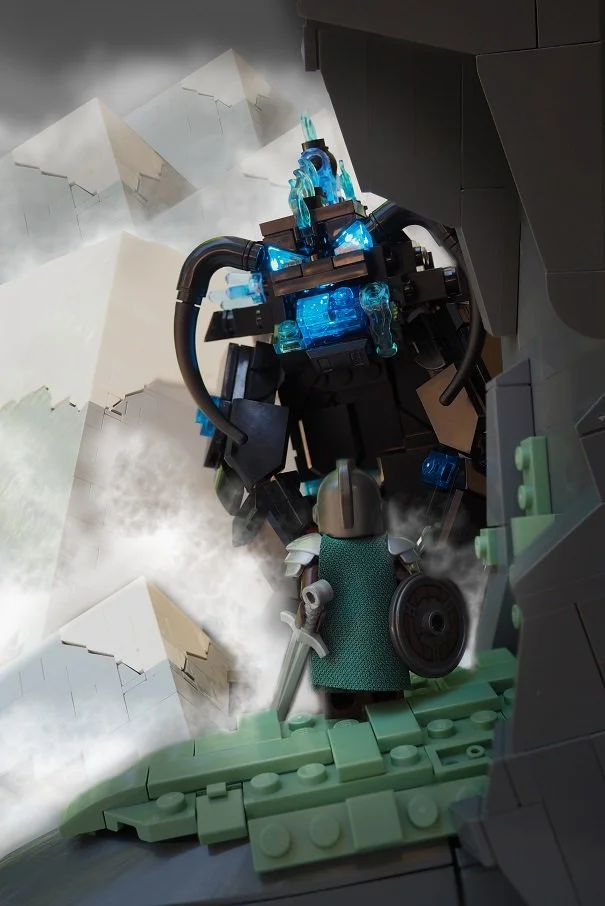
A little bit more darkness on top, and the second hero shot was ready to go!
Bringing It All Together
Presentation is always important if you want others to really be able to enjoy your MOC, but it doesn’t have to be flamboyant. However, when it comes to an immersive scene, going the extra mile with some effects that can’t be achieved with LEGO bricks—fog and light, for instance—can really make a MOC shine!
The good news is, you don’t have to have expensive software or loads of training to be able to add some special effects. I did all this with GIMP, a free open-source photo editor. And I’m entirely self-taught, though I will admit that I’ve been learning for about 10 years. But that doesn’t mean it has to take you 10 years to learn… and I hope the tips I shared today will help you get there faster than I did!
What’s the most ambitious post-photography effect you’ve added to a LEGO creation?
Do you want to help BrickNerd continue publishing articles like this one? Become a top patron like Charlie Stephens, Marc & Liz Puleo, Paige Mueller, Rob Klingberg from Brickstuff, John & Joshua Hanlon from Beyond the Brick, Megan Lum, Andy Price, Kate Harvey and John A. to show your support, get early access, exclusive swag and more.